How to record internal audio on Mac
"Internal audio" (also called system audio or computer audio) is the sound your Mac itself is playing: a browser tab, Spotify, a video call, a game. Recording it sounds like it should be a checkbox, but macOS deliberately prevents one app from listening to another app's output, so there is no built-in record button for it.
The good news: there are several reliable ways to do it. This guide covers all of them, free options first, so you can pick the one that fits.
Why QuickTime and ⌘⇧5 don't work
The recorders that ship with macOS — QuickTime Player and the ⌘⇧5 screen-recording toolbar — can only record from a microphone. Open the Options menu in either one and you'll see a list of input devices; your Mac's own output is not on it and never will be.
If you've ever screen-recorded a video and played it back to silence (or to a tinny copy of the sound picked up by your mic from the speakers), this is why. It isn't a bug or a missing permission. macOS simply doesn't expose system output as something apps can record.
Every real solution below works the same way: it adds a virtual audio device — a fake "speaker" your Mac can play into that other apps can read from like a microphone.
Option 1: OBS or another screen recorder (free, video only)
Modern screen-capture apps built on Apple's ScreenCaptureKit — OBS Studio is the best-known free one — can capture system audio as part of a screen recording.
If what you actually want is a video with sound, this is a fine answer and costs nothing. The limitation is that the audio is welded to the video: you get a movie file, not an audio track, and you can't route the sound anywhere else — into a call, a DAW, or an audio-only recorder. For audio work you'll be extracting tracks after the fact.
Option 2: BlackHole + Audio MIDI Setup (free, manual)
BlackHole is a free, open-source virtual audio driver, and it's the classic free recipe:
- Install BlackHole (via installer download or Homebrew).
- Set your Mac's output device to BlackHole.
- In QuickTime, Audacity, or any recorder, choose BlackHole as the input and press record.
It genuinely works, with homework attached. Once your output is set to BlackHole, your speakers go silent — the sound is going into the virtual device instead. To hear anything while recording you have to open Audio MIDI Setup and hand-build a multi-output device combining BlackHole and your speakers. Every device in the chain must run at the same sample rate or you'll get silence or crackling, there's no volume control anywhere (multi-output devices ignore the volume keys), and you'll be flipping output devices back and forth every session.
If you're comfortable being your own audio engineer, BlackHole is free and solid. See our full SoundPipe vs BlackHole comparison for an honest side-by-side.
Option 3: Audio Hijack or Loopback (pro tools)
Rogue Amoeba's tools are the professional answer: Audio Hijack records any app directly with effects and scheduling, and Loopback ($99) builds arbitrary virtual routing. Both are polished and deep. If audio capture is your job, they're worth it; if you record something once a month, the price stings. Comparison here: SoundPipe vs Loopback.
Option 4: SoundPipe ($10, no fuss)
SoundPipe takes the BlackHole recipe and removes the homework. No Terminal, no Audio MIDI Setup, no sample-rate babysitting:
-
Download SoundPipe and open it — the driver installs with one click (one admin prompt).
-
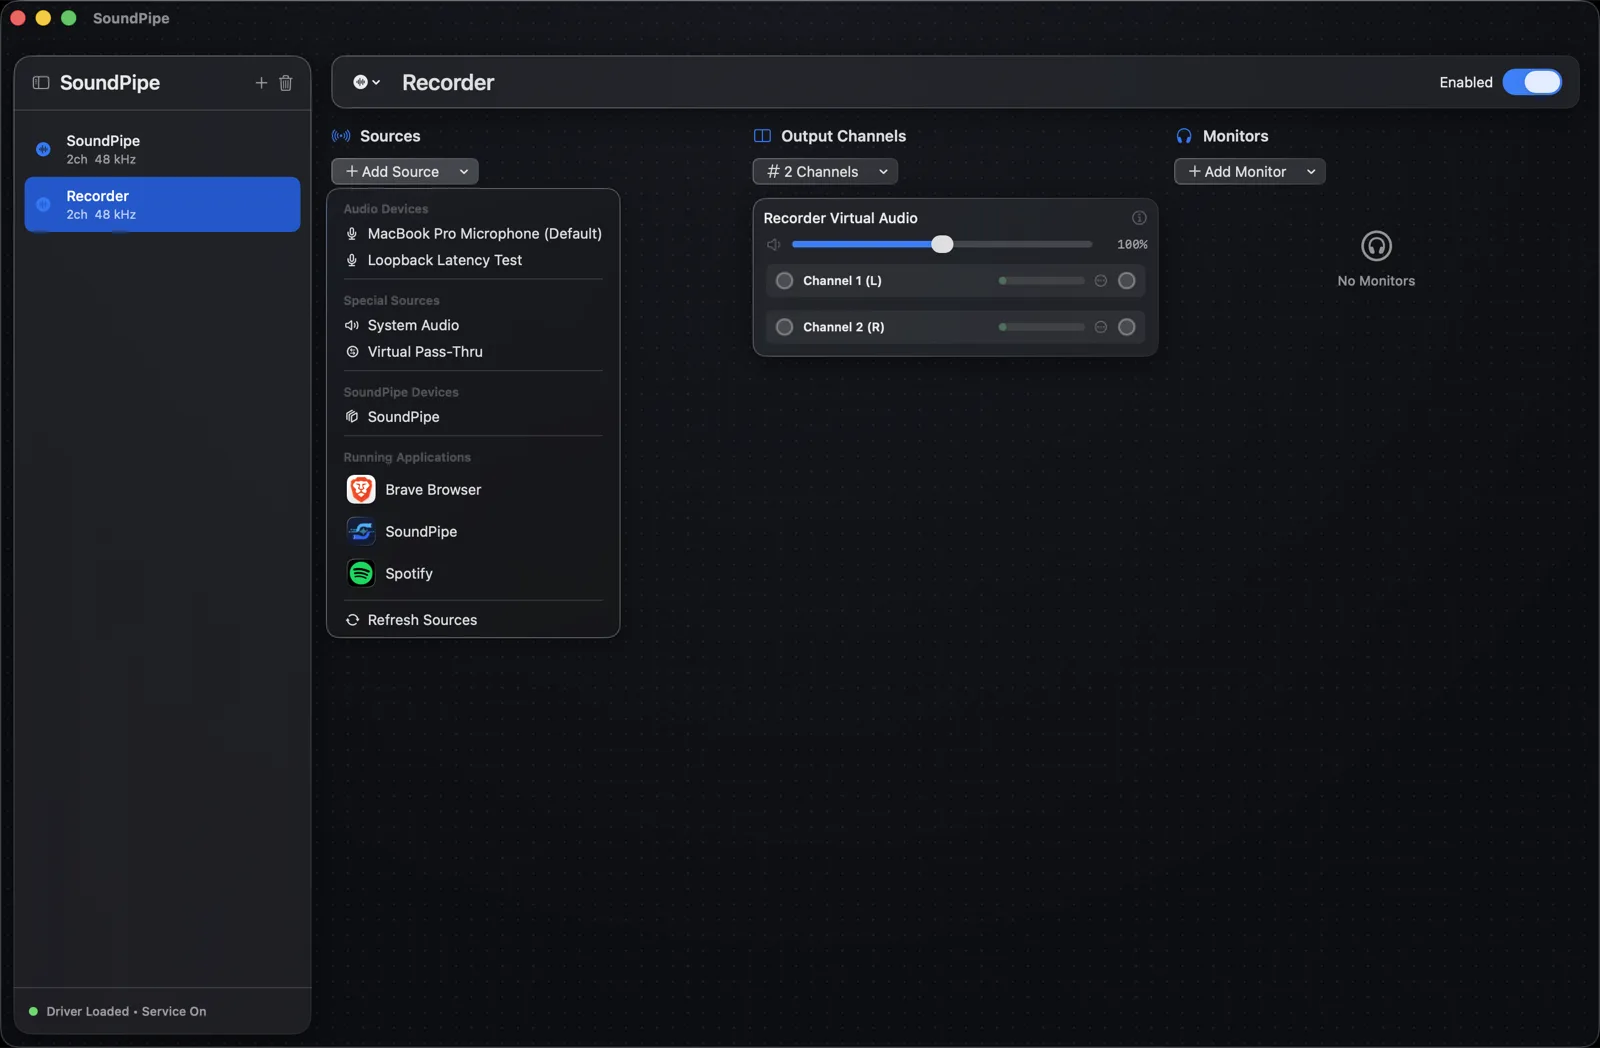
Create a device and name it — say, "Recorder". Click Add Source and pick System Audio — or pick a single app, so you capture just Spotify or just the call, with nothing else bleeding in.
-
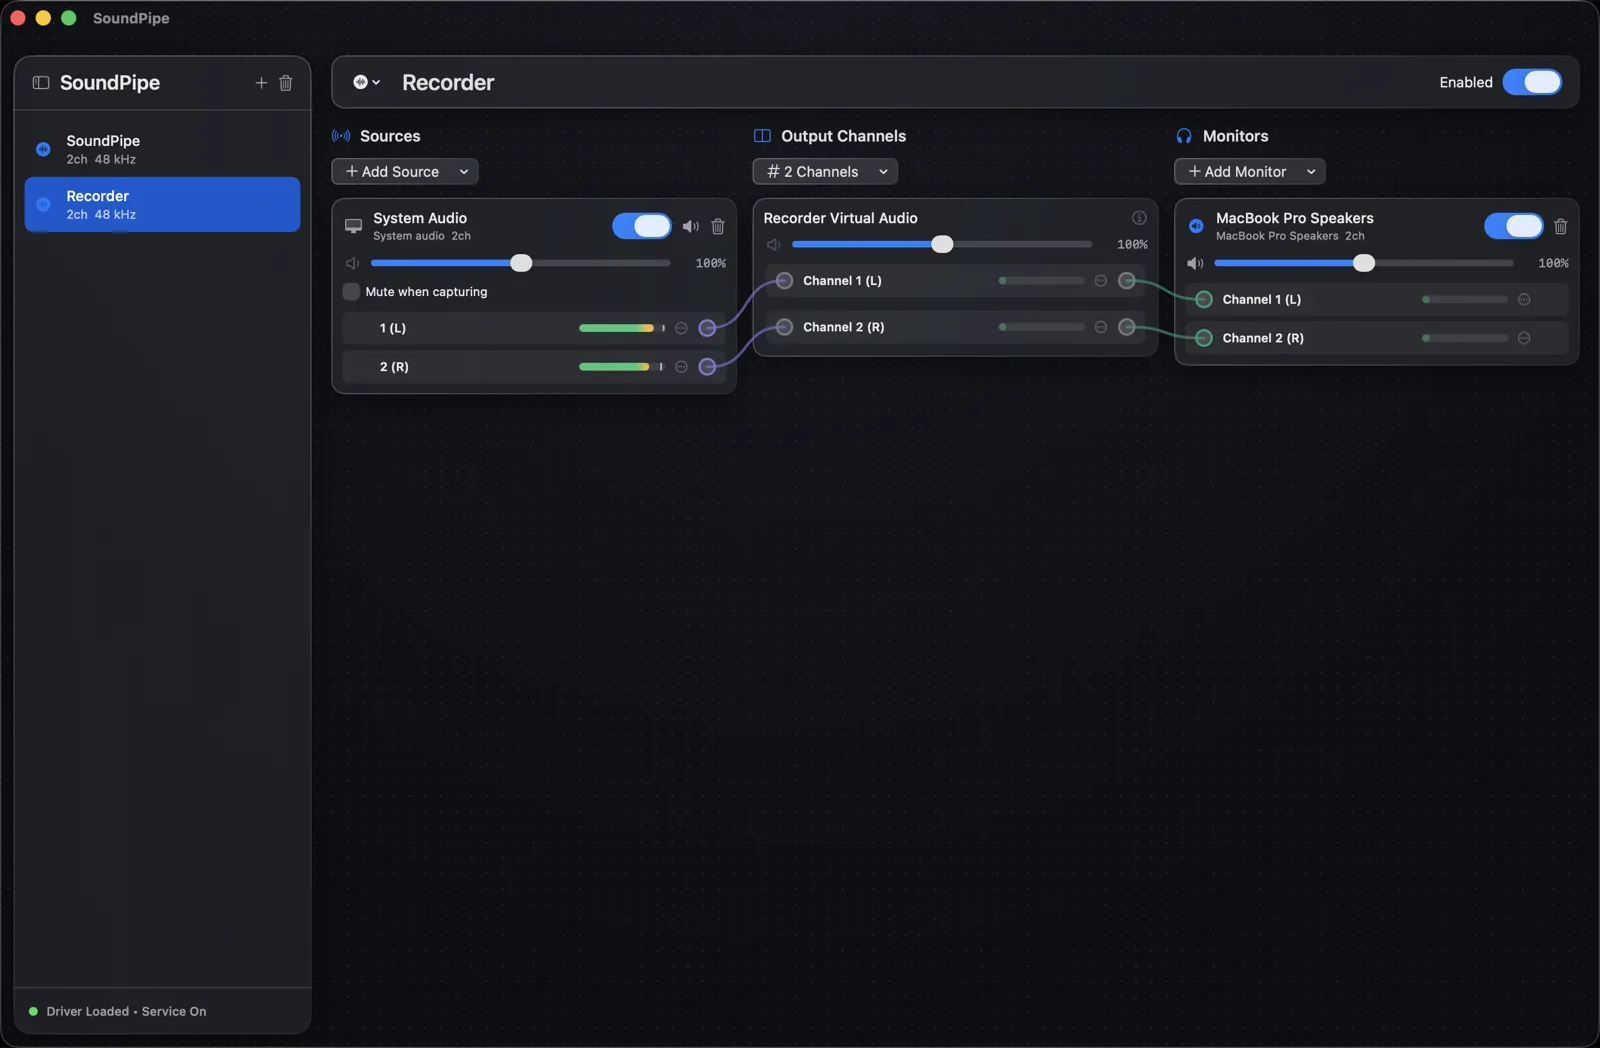
Click Add Monitor and pick your speakers or headphones, so you keep hearing everything while you record.
-
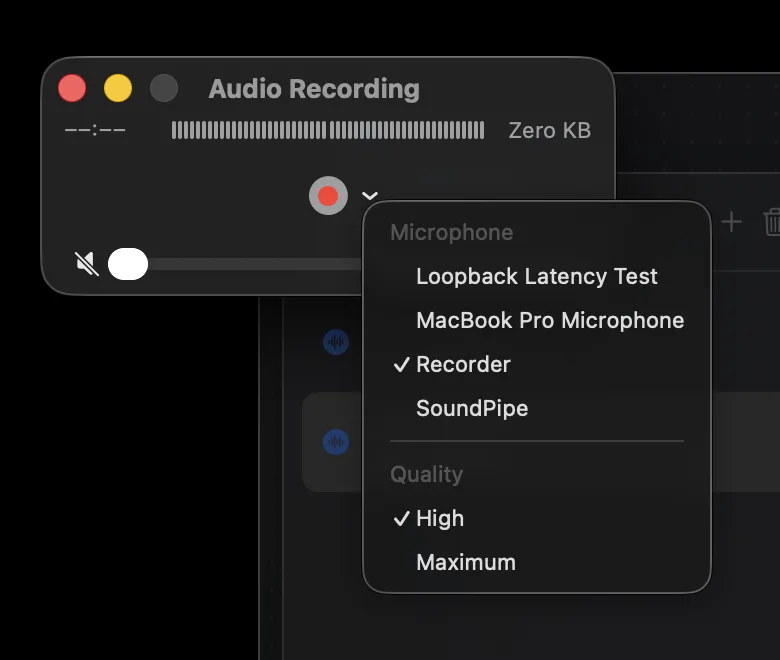
In QuickTime, Audacity, or your DAW, choose the SoundPipe device as the input and press record.
Sample rates are matched automatically, every channel gets a volume slider with live meters, and latency stays under 15 ms. Per-app capture is the part the free options can't do: BlackHole only captures everything or nothing.
It's a one-time $10 purchase that covers three Macs, and the free trial runs the complete app in 20-minute sessions — enough to record something real before paying anything.
Which should you pick?
| You want | Use |
|---|---|
| A screen recording (video) with sound | OBS, free |
| Free audio-only capture, don't mind the setup | BlackHole + Audio MIDI Setup |
| Professional recording workflows | Audio Hijack / Loopback |
| Easy audio-only capture, per-app, with monitoring | SoundPipe |
Whichever route you choose, the underlying trick is the same: give macOS a virtual device to play into, and recording internal audio stops being a fight.