How to screen record on Mac with audio
Every Mac ships with a good free screen recorder: press ⌘⇧5 and you get Apple's recording toolbar, no downloads needed. The catch is the word "audio", because it means two different things:
- Your voice, from a microphone. The built-in recorder handles this fine.
- The sound your Mac is playing (the app you're demoing, a video, a call). This is called internal or system audio, and the built-in recorder cannot capture it at all.
This guide covers both, starting with the free built-in path, then the two ways to get internal audio into a recording, then how to capture your voice and the Mac's sound together.
Screen record with your voice: ⌘⇧5 (built in, free)
If narration is all you need, macOS has you covered:
- Press ⌘⇧5 (Command + Shift + 5). The screenshot toolbar appears.
- Pick Record Entire Screen or Record Selected Portion.
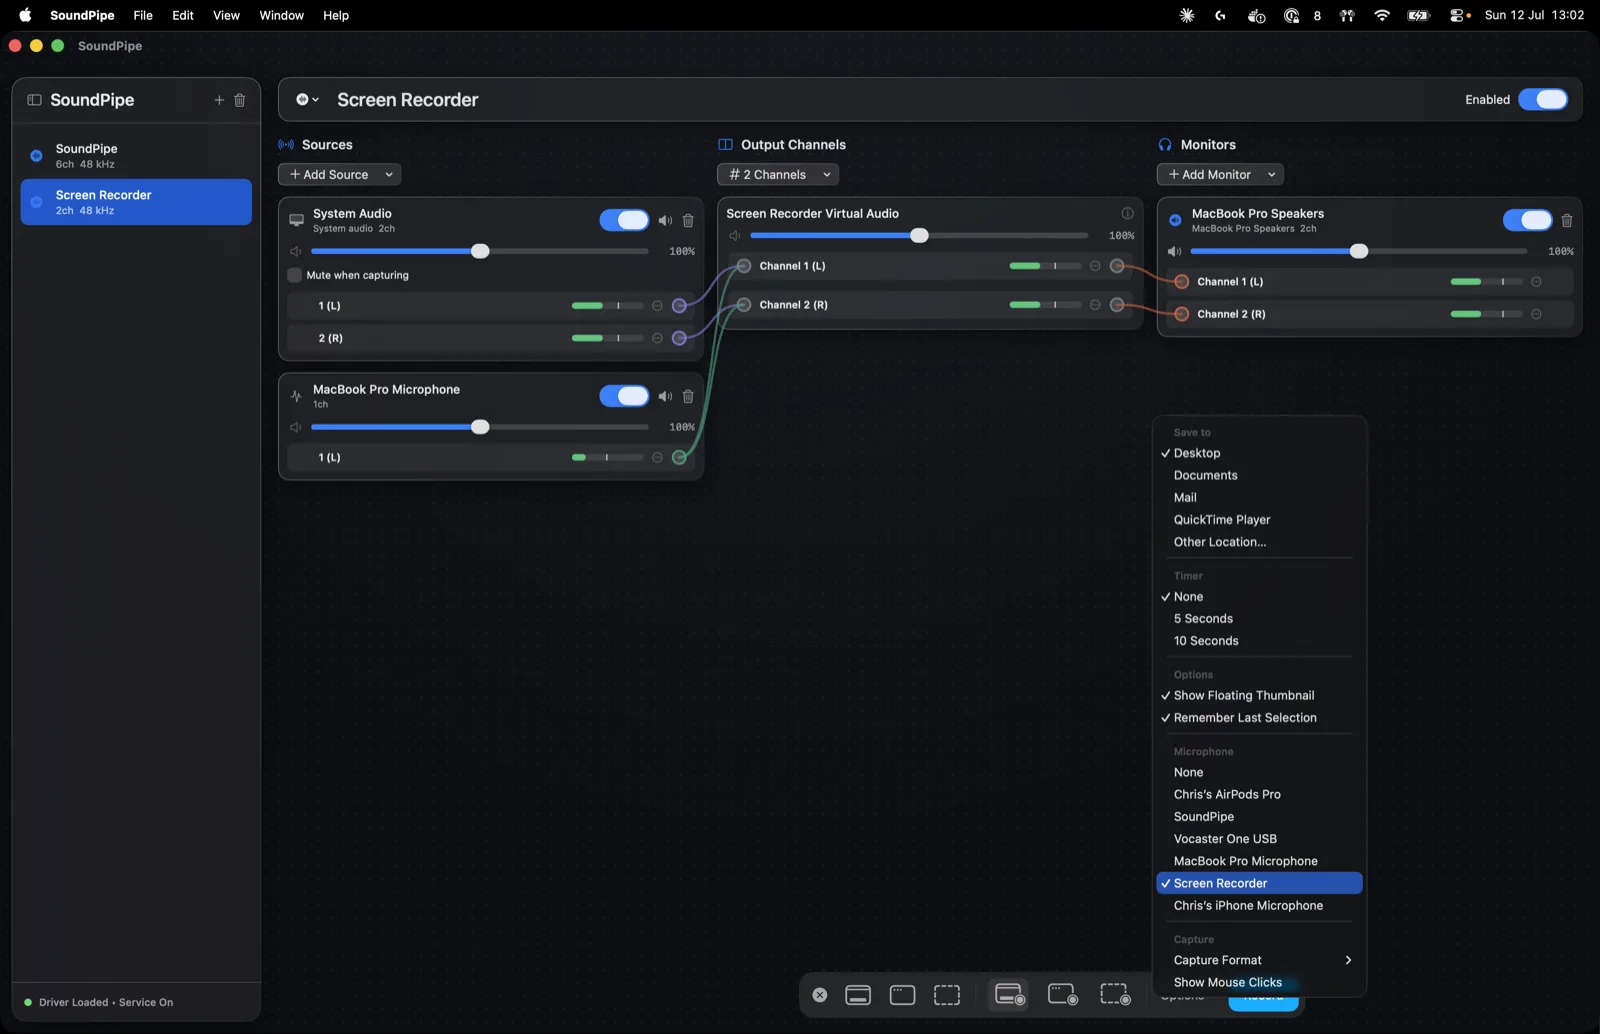
- Click Options. Under Microphone, choose your mic. This list is also where a virtual device will appear later, so remember it.
- Click Record. To stop, click the stop button in the menu bar or press ⌘⌃Esc.
Recordings land on the Desktop as .mov files by default (changeable under Options → Save to). QuickTime Player's File → New Screen Recording opens this exact same toolbar, so QuickTime is not a separate answer, it's the same recorder.
Why your recording has no app sound
Open that Options menu again and look at the Microphone list: your Mac's own output is not on it. macOS deliberately prevents one app from listening to another app's audio output, so the built-in recorder can only hear microphones. That's why a screen recording of a video plays back silent, or with a tinny echo of the sound your mic picked up from the speakers.
It isn't a bug, and no setting fixes it. To record the screen with internal audio you need one of two things: a recorder built on Apple's newer capture API, or a virtual audio device that makes system sound show up in that Microphone list. (For audio-only capture without video, see our full guide to recording internal audio on a Mac.)
Option 1: OBS Studio (free, does it all in one app)
OBS Studio is a free, open-source streaming and recording studio. On macOS 13 or later, its macOS Screen Capture source records the display and the system audio together, natively, no extra drivers.
If you're comfortable with OBS, this is the complete free answer. The trade-off is that OBS is a broadcast studio, not a record button: you set up scenes and sources, and the learning curve is real. It also welds the audio into a video file, so if you ever want the sound separately, or want to route it into a call or another app, you'll be extracting tracks afterwards.
Option 2: SoundPipe + the recorder you already have ($10)
SoundPipe creates a virtual audio device that carries your Mac's sound and shows up as a microphone, which means the built-in ⌘⇧5 recorder can capture it. You keep the recorder you already know, and it gains the one ability it's missing:
-
Download SoundPipe and open it. The driver installs with one click (one admin prompt).
-
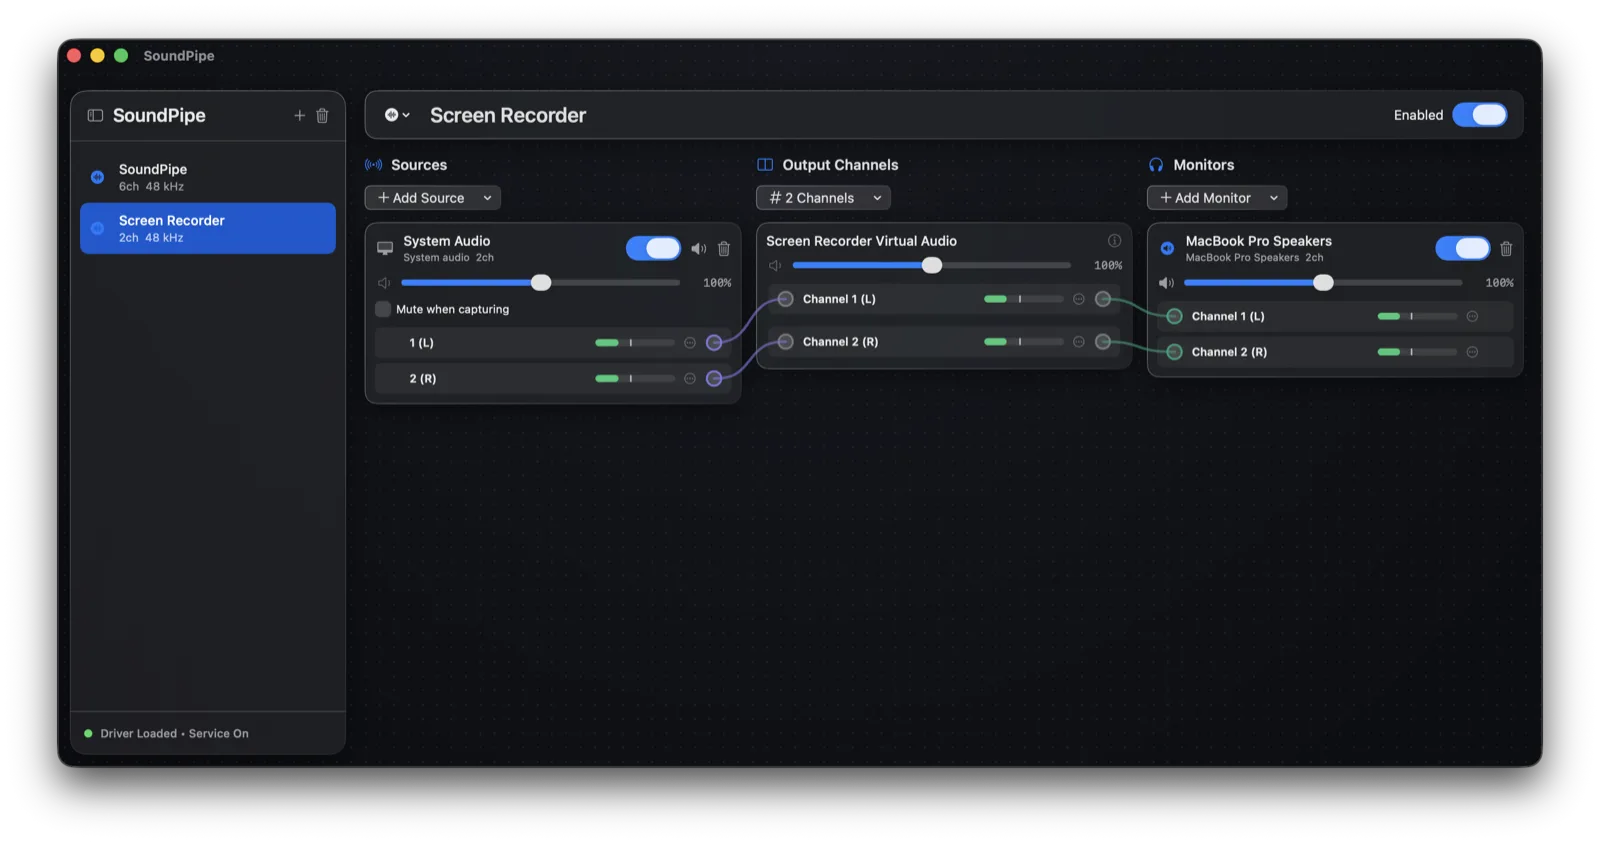
Create a device and name it, say, "Screen Recorder". Click Add Source and pick System Audio, or pick a single app so only that app's sound is in the recording and a Slack ping can't ruin a take.
-
Click Add Monitor and pick your speakers or headphones, so you still hear everything while recording.
-
Press ⌘⇧5, open Options, and under Microphone choose the SoundPipe device.
-
Click Record. The recording now contains exactly the sound you routed, in sync, with no OBS between you and the record button.
Sample rates are matched automatically, latency stays under 15 ms, and every source gets a volume slider with live meters. It's a one-time $10 purchase covering 3 Macs, and the trial runs the complete app in 20-minute sessions, so you can record a real take before paying anything.
Record your voice and the Mac's audio together
Screen recording a demo usually means narrating over app sound, and this is where the virtual-device approach pulls ahead: a SoundPipe device can carry several sources at once.
-
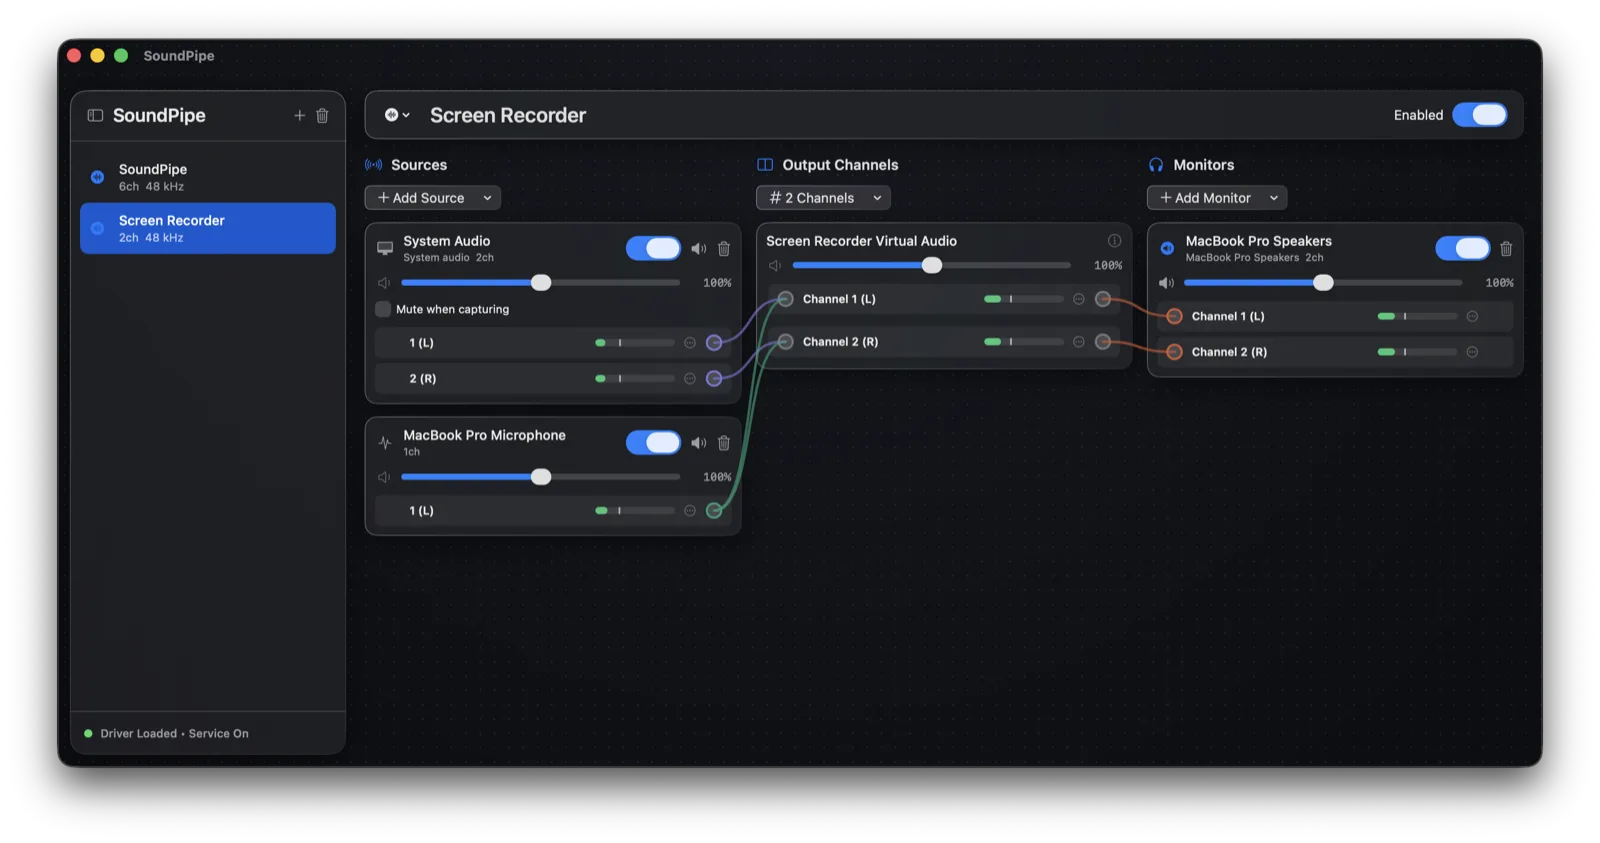
On the same "Screen Recorder" device, click Add Source again and pick your microphone.
-
Balance the mic against the system audio with the per-source volume sliders, watching the live meters.
-
Record with ⌘⇧5 exactly as before. Voice and app sound arrive premixed, in one track, in sync.
The same trick works in any app that records from a microphone, including QuickTime and Zoom. There's a longer walkthrough in our mixing a microphone into a route guide.
Which should you pick?
| You want | Use |
|---|---|
| Screen + your voice only | ⌘⇧5, built in and free |
| Screen + internal audio, free, don't mind the studio | OBS |
| Screen + internal audio with the built-in recorder | SoundPipe + ⌘⇧5 |
| Screen + voice + internal audio, mixed and in sync | SoundPipe + ⌘⇧5 |
| Audio only, no video | See recording internal audio on a Mac |
The built-in recorder was never the problem; it just can't hear the Mac's own sound. Give it a device that can, and screen recording with audio on a Mac becomes the checkbox it always should have been.